Contact Card Overview
Video Home ◂ Contact Management ◂ Contact Card Overview
What you can do with a group of contacts in Group Actions.
-
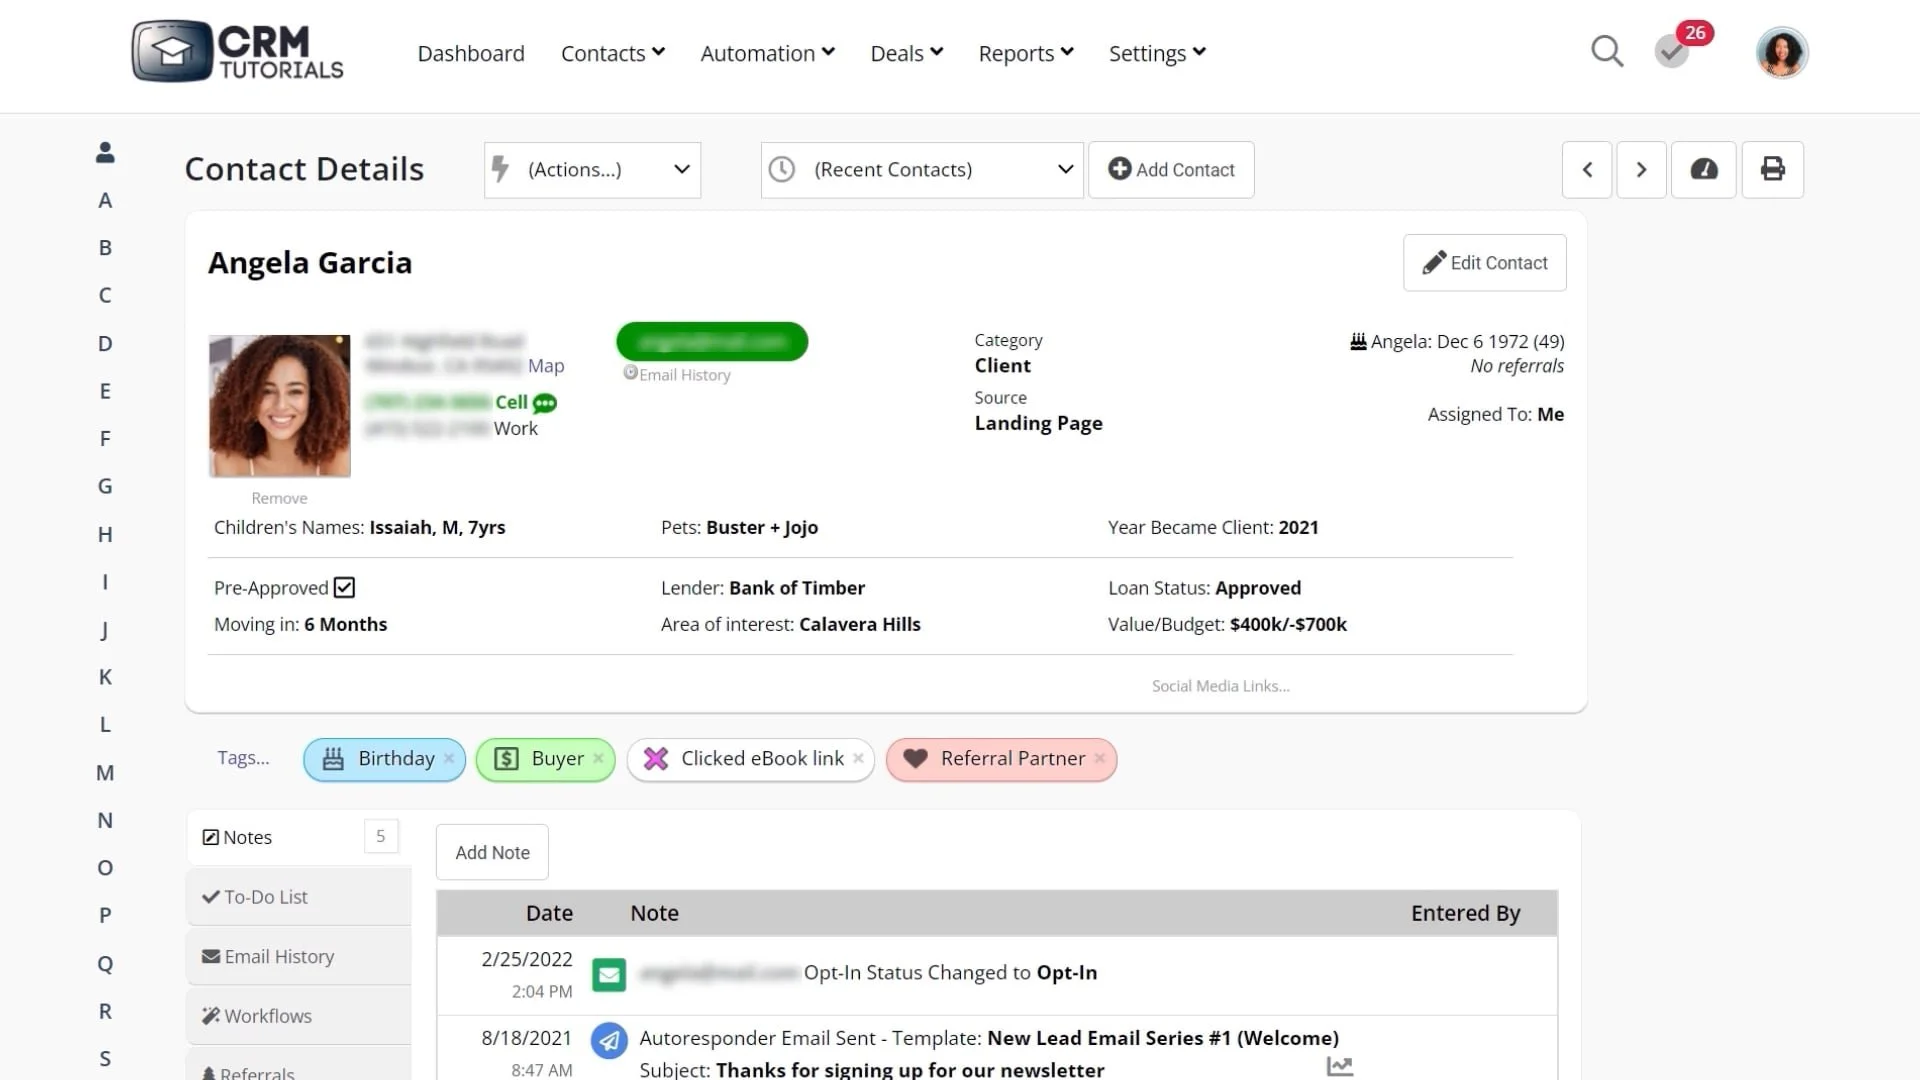
This is what we call the contact card or the contact record.
Each contact in your database will be represented on their own unique contact card.
Here you will find all of the important information about this Contact.
Starting with the actions menu – these are some of the things that you can do with this contact: like add them to a workflow, or send them an email.
The recent contacts menu will show you the last 10 contacts that you have accessed.
This drop-down menu allows you to jump to one of those contacts with just one click.
The arrows here will scroll through all of your contacts forward or backward.
This upper section will display the contact’s demographic info, plus the filtering options like Category and Source.
Also, if you have custom fields set up, they will be displayed here.
If we click on the map link, this will bring up Google Maps and show you where this person lives.
The email history link will launch your Gmail and show you all the email conversations you have had with this contact.
To edit anything in this upper section, click on the Edit Contact button and do your editing here.
Tags separate the upper and lower views. Tags are another way to categorize your contacts. To add or remove a tag from this contact click on the tags link.
We call this section the lower view.
You have several tabs with additional information about this contact. Here you will find Notes, to-dos, attachments, referrals, and more.
You can hide tabs that you don’t use or re-arrange them by clicking on the Customize Screen Link.

